How to take apart an engine
July 16th, 2016 at 10:39 pm (Technology)
Today I got to take apart an engine… and put it back together.
I attended a training class in small engines. Our idea is that this could be a great workshop for Kids Building Things. Getting to take apart an engine in middle school? Wouldn’t that have been awesome?
As it turns out, this class was also an unexpected refresher in basic engine knowledge that relates to my pilot training! We discussed 4-stroke combustion engines, why water in the fuel is bad, and what pre-ignition and detonation are. The plane I fly has a 4-cylinder air-cooled engine. The one we got to take apart in this class was a single cylinder, also air-cooled. I think it is the type of engine you’d use in a lawn mower.
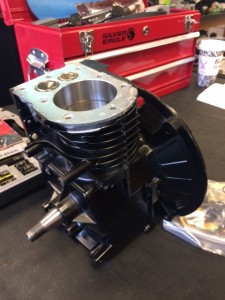
 Here is the engine before we started disassembling it. The piston is in the big shiny hole at the top. The fuel/air mixture and exhaust valves are the smaller circles on the top. The shaft sticking out goes to the magneto/flywheel system (not shown) and the other end of that axis is the drive shaft (to actually do the work you want to achieve with the engine). The black radial looking part is the oil pan. In normal operation, that should be at the bottom, so this is a vertical mount engine, and it could (for example) spin a lawn mower blade).
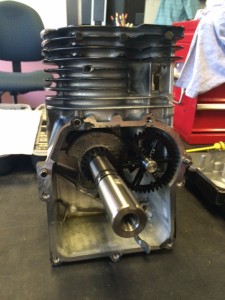
 We worked in pairs on our engines. After removing the oil pan, you can see the drive shaft (long cylinder pointing out) and the cam shaft (small plastic gear on the right). The cam shaft gives the valves their timing so they open and close at the proper points in the 4-stroke cycle.
Our instructor drilled us through the intake-combustion-power-exhaust process, which was nicely illustrated when you hand-turned the drive shaft and could see the piston go up and down and the valves open and close in synchrony.
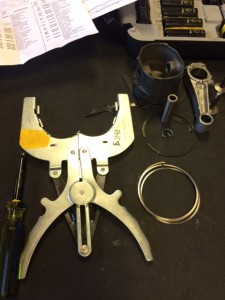
 Then he had us extract the piston from its cylinder. It has three sets of pressure rings that help give it a good fit in the cylinder and also (apparently) wipe oil down from the cylinder walls. There is a really awesome tool called a “ring spreader” that allows you to easily remove and replace these thin metal rings. At right you can see the tool with some rings next to it. The dull grey slightly oval shape sitting above the rings is the piston head, with its disconnected shaft to its right. The piston itself is round, but underneath they apparently tweaked the shape to use less material (reduce weight) which is why it isn’t quite round.
We then removed the valve assemblies, including the springs. By then we were left with a metal block that did nothing. We then put all of the pieces back together. Re-installing the valve springs was definitely the trickiest and fiddliest part – my partner and I took several attempts before we got it (success!).
In a longer class, apparently you get to put your engine on a mount and fire it up! Seeing it run after you’ve taken it apart and put it back together must be really satisfying. But even without that, I can now see how you would go about getting in there and replacing a worn part. It’s not such a mystery. And now I understand a bit more about what probably happened when my ’86 Nissan Sentra’s timing belt broke. No wonder it was a major repair!