Cardboard automata
April 26th, 2014 at 7:48 pm (Engineering, Library School)
Cardboard automata are machines made out of cardboard. They are often operated by a hand crank or dial to initiate the motion. As the primary axle turns, cams attached to it cause cam followers to rise, fall, or spin, depending on their geometry.
Just based on that description, who could resist diving in immediately to make one?
Not me.
Plus, I had an assignment from my Maker Space class to “make something you’ve never made before.” Bingo!
I discovered an excellent set of instructions, with pictures, created by The PIE (Play – Invent – Explore) Institute. I decided it would be a fun challenge to make as much of the project as possible out of “found” (available) items in my home.
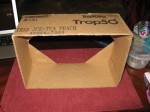
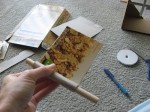
 I cut a cardboard box in half, then reinforced the corners to prevent it from collapsing sideways. I cut a hole in each side of the box to connect an axle across it. The instructions suggested using skewers for the axle and cam shafts, but since I didn’t have any, I instead used some wooden dowels I had lying around. I thought they might create a more sturdy result. However, I didn’t have a dowel long enough to span the box, so I temporarily taped three dowels together to build my first prototype. I cut out some cams out of craft foam and slid them onto the axle at different positions.
 I also created three cam followers by cutting circles out of the foam and inserting more dowels into their centers. Then I cut three holes in the top of the box for the cam followers and connected everything together.
I chose three different cam designs for my three units. The middle cam is round and centered, which generates rotation in the cam follower. The left cam is egg-shaped, which generates rotation and vertical motion. The two right cams are round but off center, and they are positioned to be 180 degrees out of phase. Therefore, they alternate in their contact with the cam follower, which goes up and down and alternates between clockwise and counter-clockwise rotation.
 At this point, when I turned the axle, the dowels wiggled back and forth and sometimes moved themselves off their cams. I consulted the instructions, which advised inserting drinking straws into the top holes so the skewers have a strong guide to keep them aligned. My dowels were far too thick for straws, so I cut up a cereal box to get a firm yet shapeable cardboard sheet. I rolled this cardboard to create tubes that were just slightly larger than the cam shaft dowels. The machine’s performance improved dramatically, and I decided it was time to glue everything down: the tubes in their holes, the cam followers to their shafts, and the cams to the axle. And it worked!
Once I had a working machine, I was free to add whatever design elements I wanted. Extending the cardboard design theme, I found instructions for how to make flowers from toilet paper rolls as well as a sprout/palm-like plant for the middle cam shaft. I glued green paper and brown felt onto the top to give it a nature-inspired look, added some paper flowers, and cut out a paper backdrop of twisting grass shapes to accentuate the feeling of motion. Finally, I used colored markers to decorate the cam followers so that their motion (and its direction) is more visually evident, since the mechanism is a focal point of the project.
Here is a longer video that explains the parts of the machine.
Susan said,
April 27, 2014 at 12:08 pm
Whoa! That is awesome! I had never heard of cardboard automata, and I had no idea what to expect when I clicked through to your blog post. I somehow expected a humanoid robot powered by a hand-crank. Ha!
Brittany said,
April 27, 2014 at 6:05 pm
Kiri, I love your automata! It looks great, and your video provided some great details on your thought process and how the machine works.
Holly said,
April 28, 2014 at 12:17 pm
This is so cool! I like that three different cams were used to show that each shape produces a different movement. I also have to try these cardboard flowers!
Claire said,
May 7, 2014 at 6:12 pm
Very cool! I especially like that you made it part of the project to only use things you already had. It sounds like you were already pretty crafty so you had some handy things that others might not have on hand, but with that extra challenge, I bet people would be innovative and find ways to make it work. I’m a big fan of the environmental/upcycl-ing nature of many maker projects.
Kiri said,
May 8, 2014 at 10:07 am
Thanks all! The cardboard flowers are incredibly easy to make — a very pleasing sub-project that I think would be fun for a group, too.
I didn’t completely manage to use only items from my house — mainly the cams, which I purchased the foam for. But actually I think you could also make those out of cardboard leftover from the boxes. It’s not as easy to cut and shape, but definitely doable, and then the whole thing would be cardboard!
Julia said,
November 5, 2014 at 9:58 am
This is GREAT! My son wants to create something like this for his ‘simple machines’ science project. Did you use a washer on the cam follower or is that just glue?
Thanks!
Julia said,
November 13, 2016 at 3:20 pm
I’m a teacher and made our cams out of foamies (per the Exploratorium instructions) however, they continually malfunction. They cam falls off the cam follower. I’ve tried adding bushing on the sides to keep the rod in place, as well as, gluing the cams to the rods. Do you feel the foam board works better for the cams. Do you have any troubleshooting tips?