I forged steel!
April 14th, 2017 at 11:06 pm (Crafts)
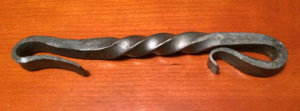
I recently attended an introductory blacksmithing class at Adam’s Forge. I walked in with no experience and no idea what we would be making (the class description is tantalizingly vague). Four hours later, I emerged with my own forged steel bottle opener!

The class began by covering important safety topics, like how the steel inside the forge would reach 1600 F, and that even after you take it out and it cools from hot yellow to orange to red to dull grey, it is still 900 F and “will give you a blister.” We learned to use tongs to manipulate the steel bars and carry them safely between forge and vise or anvil. We also used safety glasses and earplugs (four blasting forges and ten hammering smiths makes a lot of ruckus).
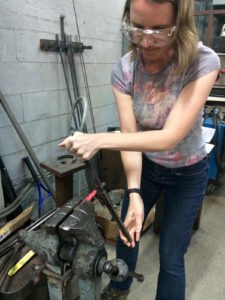
 The first step was to create the lovely twisted handle. This was actually the easiest part of the project. I was given a steel bar (7″ long and 3/8″ square). I heated the steel bar in the forge, then clamped it in a vise. I placed a wrench three inches from the vise and then twisted several times to wind the bar.
“While hot, steel feels like thick clay,” our instructor Scott advised, and I found this to be true. It cools off in less than a minute, so if you take too long then it’s back into the forge for another round.
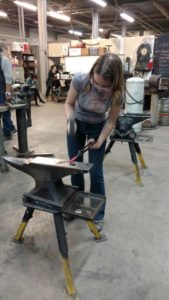
Next, we had to “draw” the steel out on each end. This involves heating a square end of the bar and then pounding it, using the hammer and anvil, to shape it as desired. First you pound on the tip to shape it rather like a chisel point, then work backwards up the bar to progressively thin and shape the end into a wedge. Each time you hit it with the hammer, it spreads out a bit, but it spreads in all directions, so you alternate between hitting the wedge and turning it on its side to pound the bar and maintain its width. Again, you get about 15-20 seconds of pounding time before it has to go back into the forge and be re-heated.
 Once the piece had a tapered wedge on each end (this step alone took about 1.5 hours to accomplish), I shaped the wedges into the proper curved pieces. The left end is a hook so the bottle opener can hang from your pocket or other location. The right end is the business end and requires some effort and precision (or luck) to get the hook the right size to snag the edge of a bottle cap, the loop the right length to apply leverage in the center of the cap, and the handle around 45 degrees to make it an ergonomically pleasant and energy-wise efficient operation when removing bottle caps.
One fascinating technique is that you hammer the end curl into the wedge first (bending it over the edge of the anvil), then reheat the tip, dip it in water (to “freeze” the curl) and then pound it over the anvil’s horn to bend the (hot) stem backwards without affecting the (cooler) shaped curl. Nifty!
Also, hot steel oxidizes much faster than room-temperature steel, so as you work, grey dust and chips flake off of the piece. At the end, I used a wire brush to scrape off any loose “scale” and make the piece a little shinier (about the luster of pencil lead).
Today I got the opportunity to try out my new device on a bottle of root beer. IT WORKED!!!
It is a fine, fine thing, to make an object – and one that works – and to learn new skills in the doing.